The ‘Visibility’ condition options.
The visibility option can facilitate your work by avoiding needless entry. This allows you to adapt your form based on the situation encountered and therefore lighten it up. You will save time and the user experience will only be better!
Let us imagine that…
- You are heating contractor.
- You make home interventions to install, repair or replace various heating systems.
- You enter all the necessary information in your form: customer contact information, service type, boiler type, etc.
- You have chosen to complete your Kizeo Forms form based on the type of delivery to be made to your customer: new installation, repair or replacement of the boiler.
- By using the Visibility option, you will unlock specific fields to be completed depending on the service performed.
You can therefore:
- Add a single visibility condition, for example:
IF you select “New installation” in the service type list, THEN you will see the fields dedicated to the first installation of a boiler (other proposals for the repair or replacement of the boiler will be “hidden”).
- Add several visibility conditions, for example:
IF you select “New installation” OR “Replace boiler”, THEN you will see the fields dedicated to the billing.
IF you select “New installation” AND check the box “Estimate approved by the customer”, THEN you will see the signature fields appear.
Step 1 : Create a form.
- Go to www.kizeoforms.com.
- Go to Forms -> Create a form or Modify a form.
- Insert the first required fields (i.e. last name, first name, customer address, etc.).
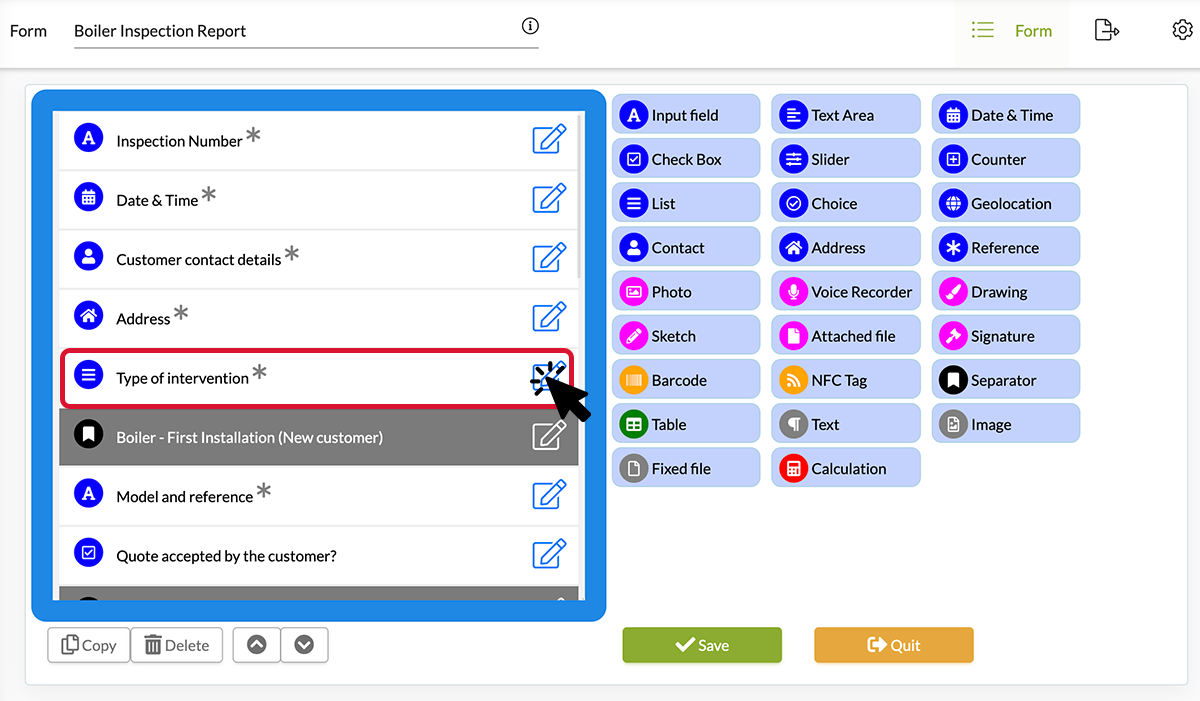
- Insert your list. In our example, our list is entitled “Type of intervention” and includes the following choices:
– New installation (new customer),
– New installation,
– Repair (new customer),
– Repair,
– Replacement (new customer),
– Replacement.

Insert in this same form all entry fields that you will have to complete for the 3 types of intervention.
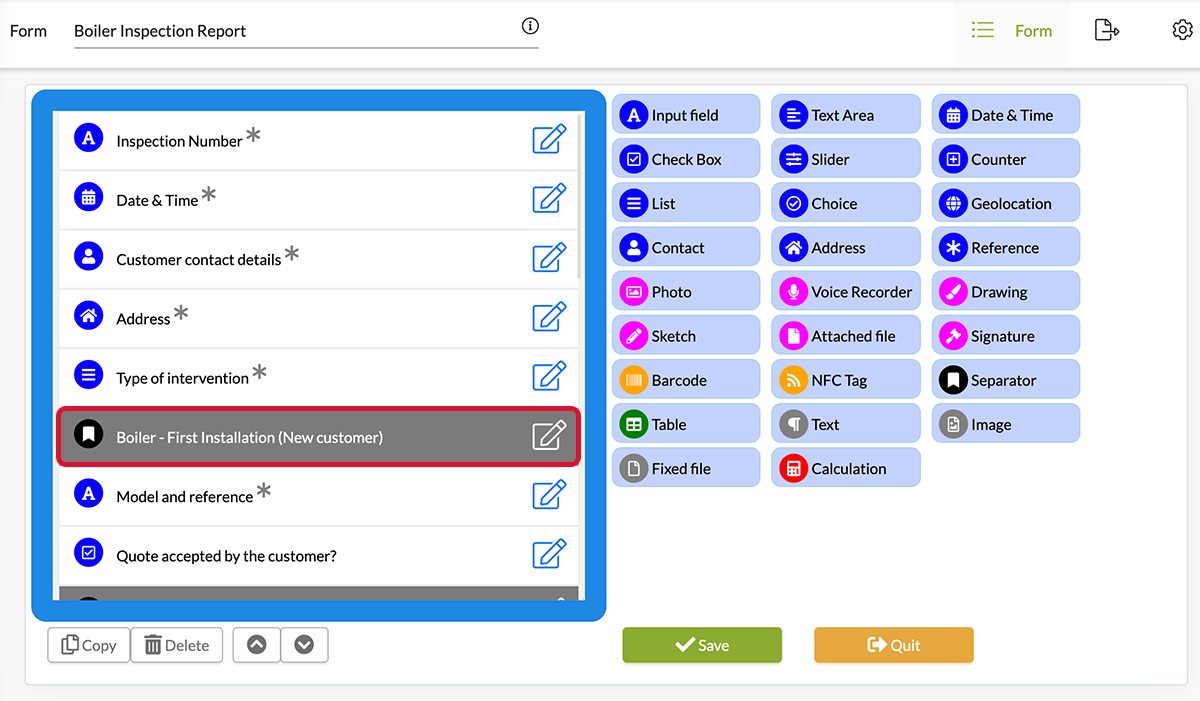
Tips: To assist in reading, you can insert separators.
Step 2 : Visibility options.
Among the elements that make up your form, some are specific to each type of service.
- Click on the pencil to determine the field.
- Go to the Visibility tab.
Important Information:
If using visibility options on Separators, all elements present in the separators will have the same visibility option.
These visibility options are available for all elements (i.e. text field, date, address, etc.).
Make one or more fields visible based on a visibility condition.
Suppose that we want to determine the visibility of the fields contained in the separator “Boiler – First installation (new customer)” based on the “New installation” element of the “Service type” list.
Go to the separator options, Visibility tab.
Choose:
- =: When the Service type is strictly equal to New installation, then the entry field will be visible.
- ≠: When the Installation type is strictly different from New installation (ex. Repair or Replacement), then the entry field will be visible.
- Within the following values: When New installation AND/OR New installation (new customer) are selected under Service type, then the entry field will be visible.
- Out of the following values: When New installation AND/OR New installation (new customer) are not selected under Service type, then the entry field will be visible.
- Includes: When Service type includes the word installation (i.e. new installation AND/OR new installation (new customer) are selected), then the entry field will be visible.
- Does not include: When the Service type does not include the word installation, then the entry field will be visible.

We now assume that the installation number corresponds to a Slider ranging from 1 to 10. We want to obtain the visibility from an entry field, such as when we set the visibility to the number 5.
Choose:
- =: When the Installation number is strictly equal to 5, then the entry field will be visible.
- ≠: When the Installation number is strictly different from 5, then the entry field will be visible.
- <: When the Installation number is less than 5, then the entry field will be visible.
- ≤: When the Installation number is less than or equal to 5, then the entry field will be visible.
- >: When the Installation number is greater than 5, then the entry field will be visible.
- ≥: When the Installation number is greater than or equal to 5, then the entry field will be visible.
- Including between: When the Installation number is between 1 and 5, then the entry field will be visible.
- Not including between: When the Installation number is not between 1 and 5, then the entry field will be visible.

Note: It is also possible to set the visibility with an empty field. If information is entered in this field, then the element will not appear.
Tip: You can determine the visibility of a field based on a signature field signed or not.
Here, If The Customer signature field is signed, then the Technician signature field will be visible.

Make one or more fields visible based on several visibility conditions.
- All conditions must be verified:
To do so, you must configure your visibility conditions and check the box “All visibility conditions must be checked”.
In our example, the entry field will be visible IF Type of Intervention is strictly equal to New installation (new customer) AND IF “Quote accepted by the customer” check box is checked.

- At least one condition must be verified:
Configure your visibility conditions and check the box “At least one visibility condition must be checked”. For example, the entry field will be visible If Service type is equal to New installation (new customer) AND/OR IF Service type is equal to New installation.
- Do not forget to Save!
Make an item visible based on a user’s profile:
As explained in our introduction, only the manager can validate the order with a signature. Other users should not see this element. For this, it is necessary to make visible an element according to the profile of a user.
Custom User Fields:
You must first set up your Custom User Fields and change your manager profile on the administration platform.

Configuring the visibility of elements:
- Then go to your form and configure your visibility conditions based on this new information.
- Here we add to our Signature element: Visible if “Status = Manager”.

- From now on, only the person with the status of manager will be able to see the Signature element.
- Do not forget to save!
Make a field always hidden:
Check the Field always hidden box

- From now on, the item will no longer be visible on the mobile device.
- Do not forget to save!
Do not hesitate to comment on this article!
All your questions, comments and suggestions are most welcome!


Post a comment