Prefer to view the site in English? For relevant information, visit the English version of the website.
22Apr, 2020
0Comments
affichez-vos-donnees-pushees-sur-un-calendrier

Push planning: View your pushed data in the form of schedule

Want to pre-fill forms and send them to your field workers for them to complete it? Got a job list for the day with the upstream information from these jobs? Want to send these jobs to your onsite staff or field workers? With the push planning, discover how to display your pushed data in the form of a schedule on your mobile phones!

Step 2: Pre-fill and send form.

Go to the form general Options, to the Mobile tab, and check the ‘Allow data to be pushed to mobile devices’ box.

This option will allow data to be sent to your users’ mobiles.

Go to the form general Options, to the Mobile tab, and check the 'Allow data to be pushed to mobile devices' box.

Step 2: Pre-fill and send form.

Three options are available, but this tutorial only deals with two of them.

Option 1 : Pre-fill a form through the Web Entry.

When you have just a few forms to send to filed works, you can choose this option.

  • Go to the menu Data -> Planning.
  • Click on Create.
  • Fill in the fields: Select a form, Start of the event and End of the event.
  • Click on Save.

The web entry is opening.

  • Pre-fill the desired form with all the available information you have, passing through the web Entry.
  • Once you input the data, click on Transfer and then assign a recipient to the form (the list proposed is that of your users).
Pre-fill your form with the web entry

Option 2 : Pre-fill forms through Excel import.

When you have lots of forms to pre-fill, we recommend this option. Much more practical!

1. Set up the import model.

Here you will define your import model, in correlation with the Excel file that you will create in the second step.

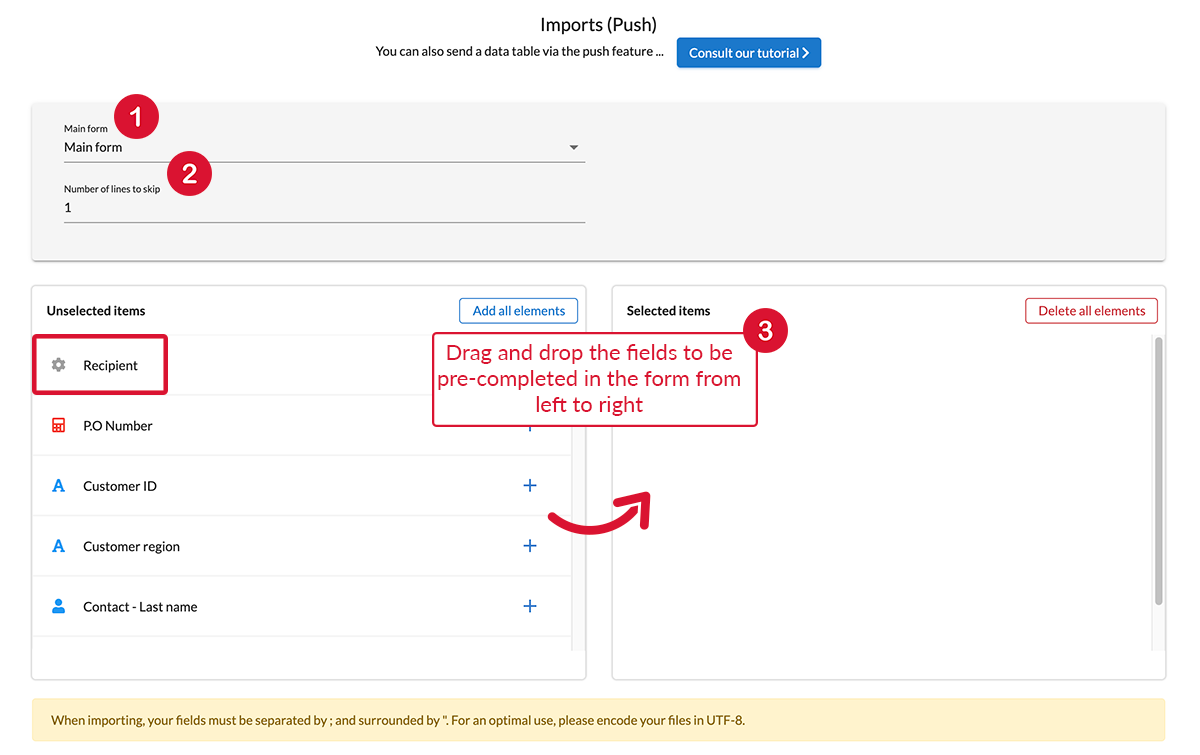
  • Go to your form Options, then in the imports (Push) tab.
  • Select Main form.
  • Fill in the number of lines to ignore on Excel. As a general rule, it is the first line that corresponds to the titles given in each column. The computer will not take this line into account.
  • Drag and drop the fields to be pre-completed in the form from left to right.
Drag and drop the fields to be pre-completed in the form from left to right.

2. Create the Excel file to import.

You can create your own template but we advise you to use the one generated by Kizeo Forms.

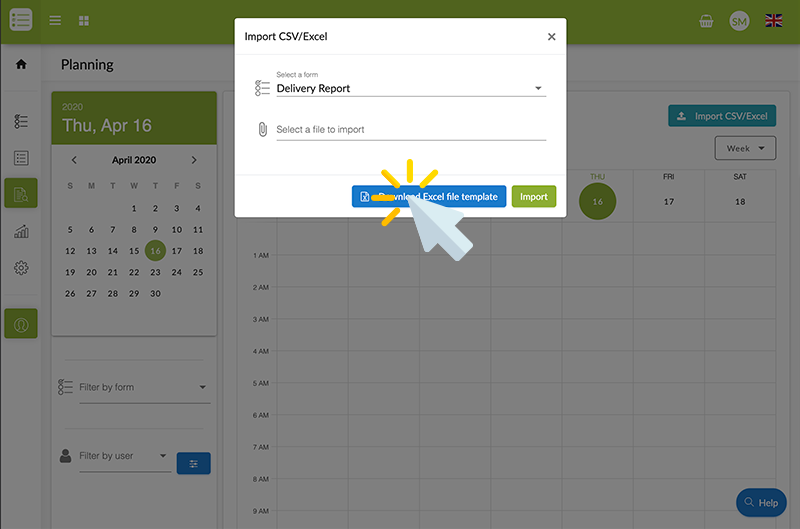
  • Go to the menu Planning -> Data
  • Click on  Import CSV/Excel.
  • Select your form.
  • Download your excel file template.
  • Fill in your Excel file and save it.
Click on Download your excel file template

The first column corresponds to the start of the event and the second to the end.

Then, you can find your different fields classified as you ordered them previously, in the options of your form.

The first column corresponds to the start of the event and the second to the end. Then, you can find your different fields classified as you ordered them previously, in the options of your form.

Notes :

  • For the Checkboxes fields: write “true” in your Excel document if you want your checkbox to be checked.
  • For the Geolocation fields: enter the address with a Latitude,Longitude format.
  • Even if a field has a default value, you must enter it.
  • You must pre-fill all the References elements.
  • In order to separate a multiple type list, you must insert commas.

3. Import the Excel file to push the forms.

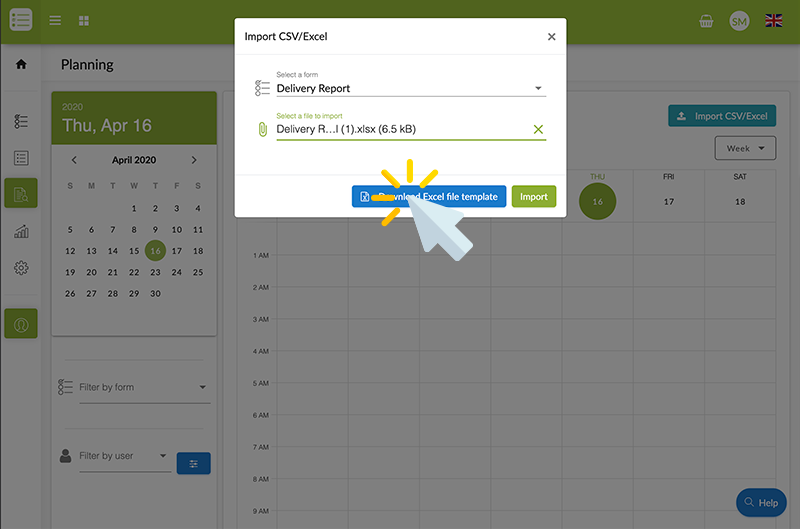
  • Go to the menu Planning -> Data
  • Click on  Import CSV/Excel.
  • Select your form.
  • Choose your previously Excel file by clicking on Select a file to import.
  • At the end of the uploading, click on Import.
Choose your previously Excel file by clicking on Select a file to import.


  • The third method  provides an automated push, while using our Web Service. This method requires a level of computing skills. If you require more information, please contact our team on +33 490 23 67 60 or at support@kizeo.com.

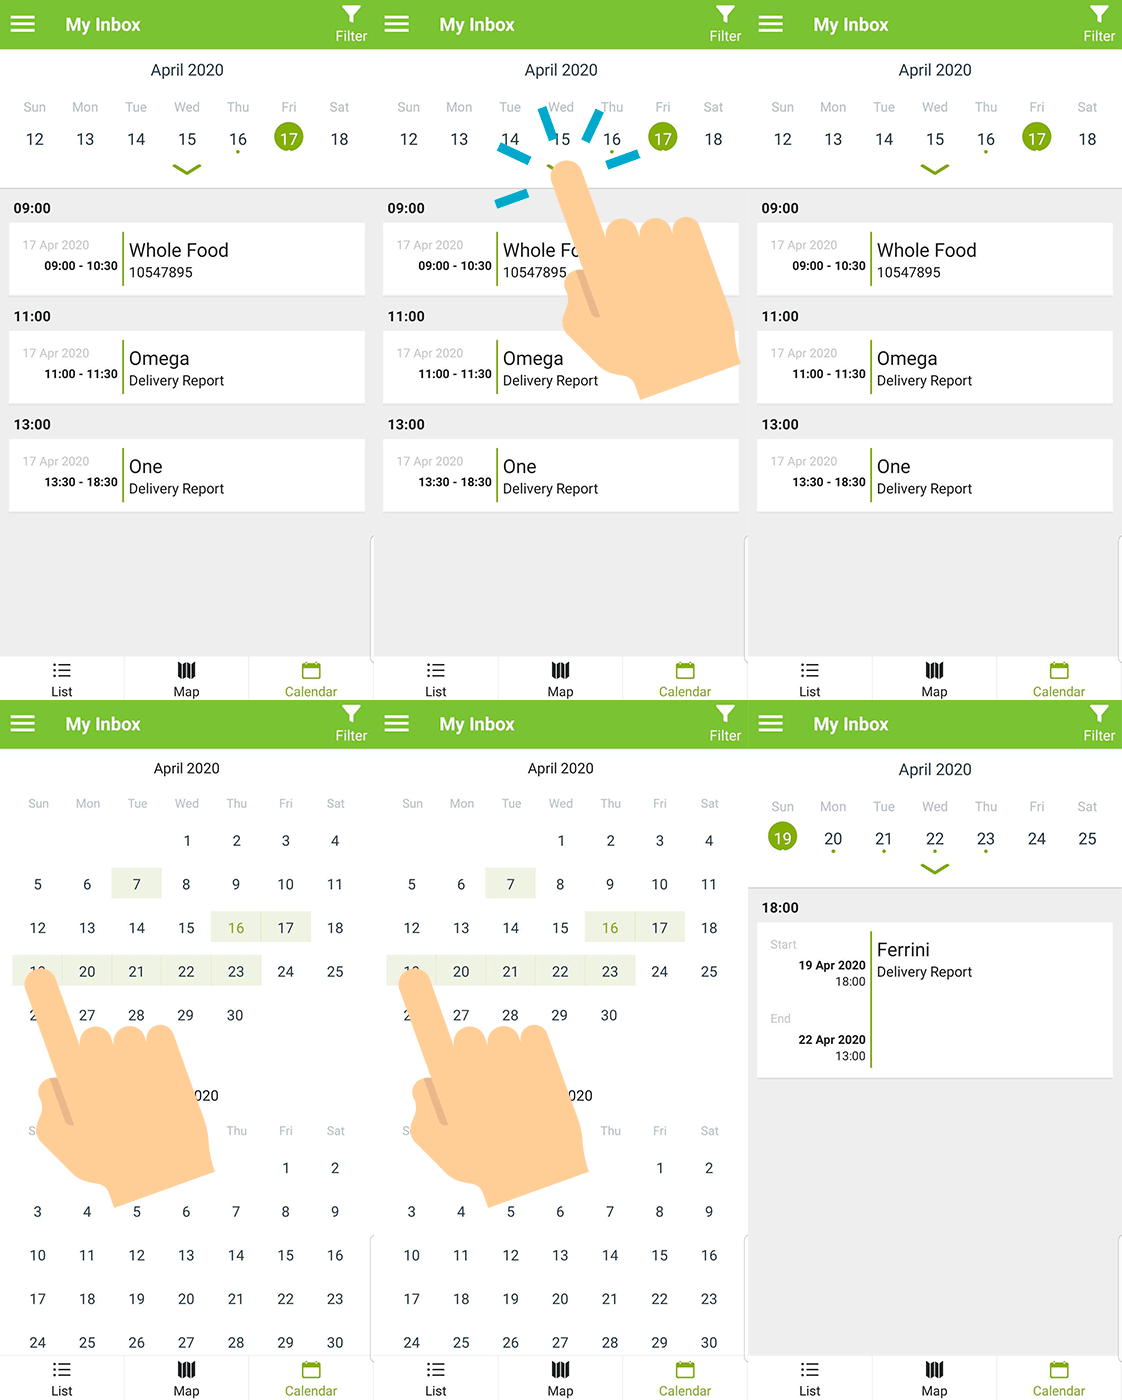
Mobile display

The mobile display of the schedule

The management console display

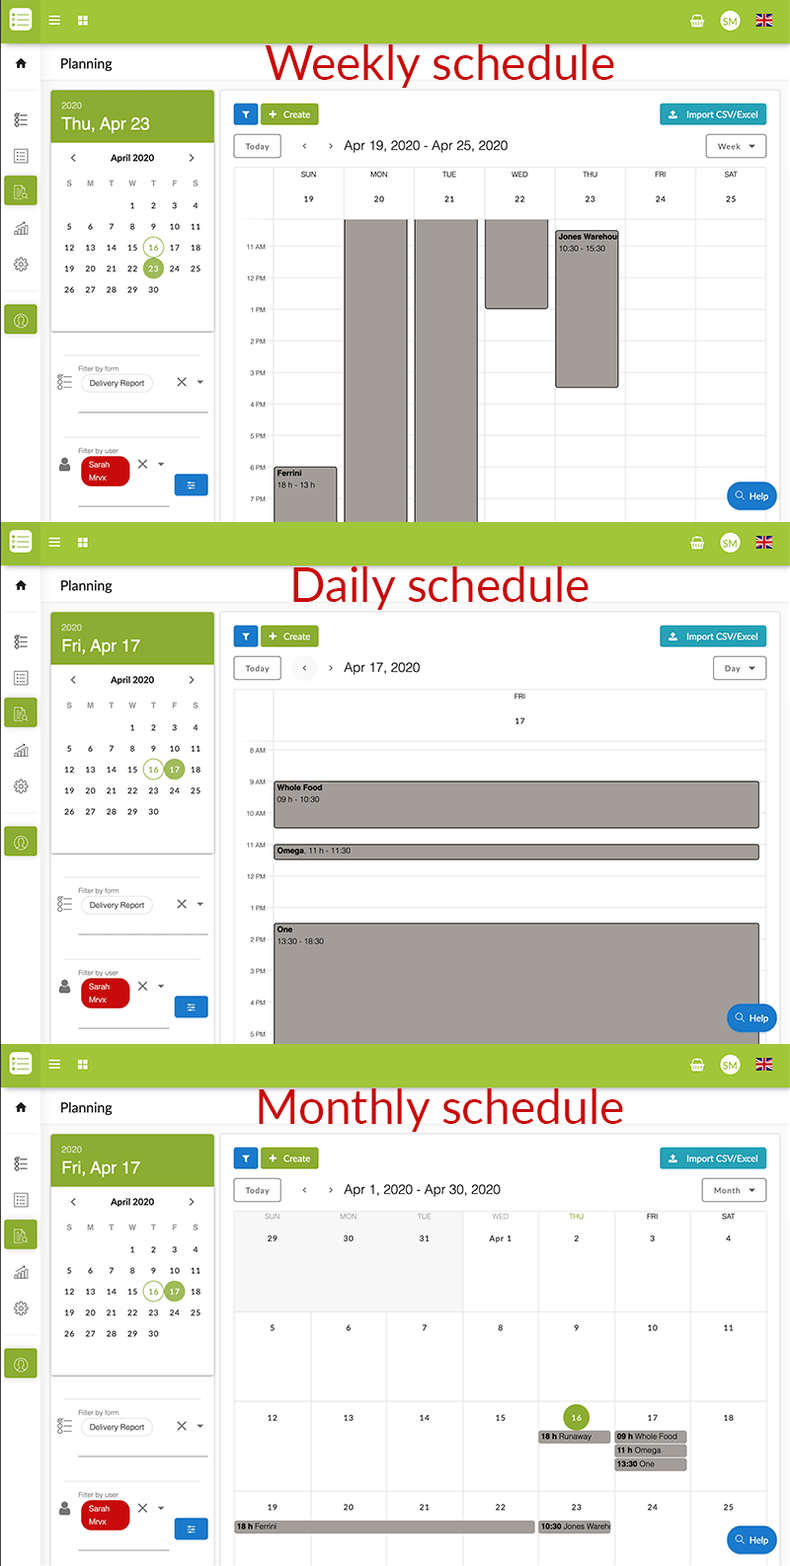
You can have a precise overview of the daily schedule of your employees or switch to a wider view on a weekly or monthly basis.
These views offer a better overview to facilitate the manager’s task.

  • Go to the menu Data -> Planning.
  • Click on Filter by form and select the form(s) you want to view the pushed data.
  • Choose the user(s) through the Filter by user menu or your group(s) with the blue button.
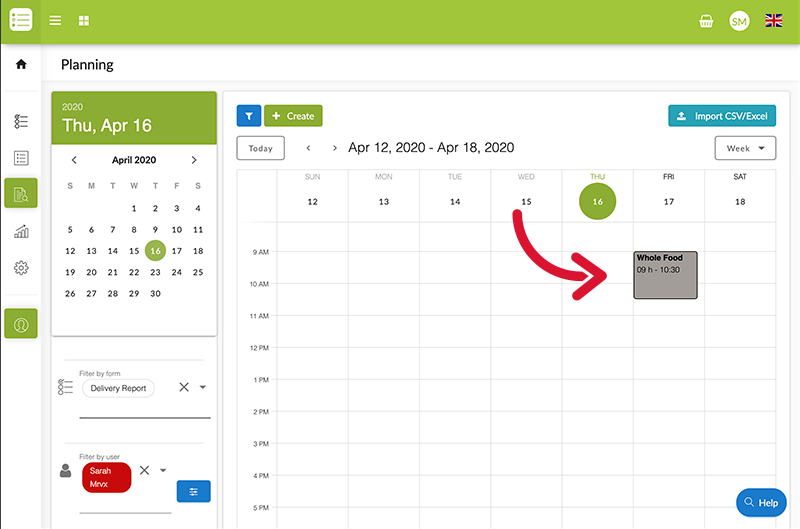
  • The schedule appears
The schedule appears

Using the Day/Week/Month button (top right), you can switch from a daily view to a monthly view.

Using the Day/Week/Month button (top right), you can switch from a daily view to a monthly view.

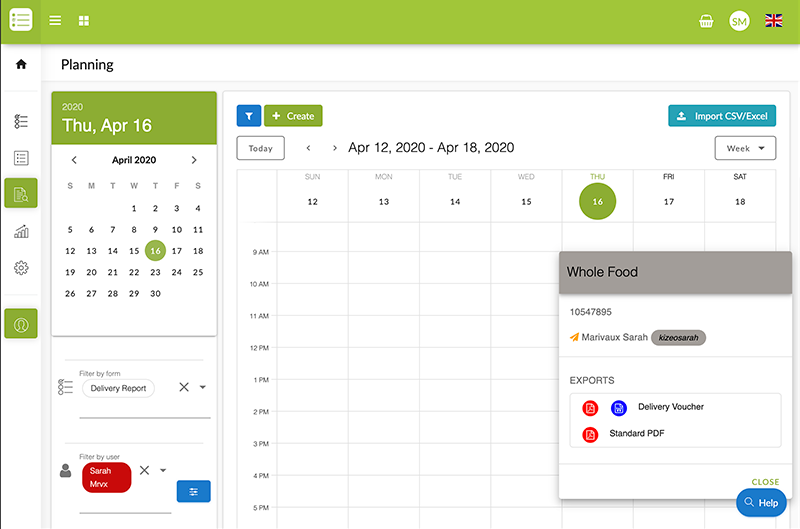
Click on a data to view its status and its export(s).

Click on a data to view its status and its export(s).

To go a little bit further…


Feel free to comment this article!
We would be glad to hear any question, comment or suggestion you may have !

Post a comment

Your email address will not be published. Required fields are marked *