

The Push: Send pre-filled forms to your field workers!
Discover how to send your pre-filled forms from the office to the mobiles of your field workers, and follow the status of your ‘Push’ (forms transfered).
Want to pre-fill forms and send them to your field workers for them to complete it? Got a job list for the day with information upstream from these jobs? Want to send these jobs to your onsite staff or filed workers?
Pre-filled forms Step 1 : Activate the option to allow the Push.
- Go to the form general Options, to the Mobile tab, and check the ‘Allow data to be pushed to mobile devices’ box. This option will allow data (pre-filled forms) to be sent to your users’ mobiles.

Step 2: Pre-fill and send form.
Three options are available, but this tutorial only deals with two of them.
- Option 1 should be preferred for sending small amounts of data.
- Option 2 should be preferred for sending large amounts of data simultaneously.
- The third method provides an automated push, while using our Web Service. This method requires a level of computing skills. If you require more information, please contact our team on +33 490 23 67 60 or at support@kizeo.com.
Option 1 : Pre-fill a form through the Web Entry.
When you have just a few forms to send to filed works, you can choose this option.
- Pre-fill the desired form with all the information you have available, passing through the web Entry. See tutorial the Web Entry.
- Once your data are input, click on Transfer and then assign a recipient to the form (the list proposed is that of your users).
Option 2 : Pre-fill forms through Excel import.
When you have lots of forms to pre-fill, we recommend this option. Much more practical!
1. Set up the import model.
Here you will define your import model, in correlation with the Excel file that you will create in the second stage.
- Go to your form general Options, then in the imports (Push) tab.
- Select Main form.
- Drag and drop the fields to be pre-completed in the form from left to right.
- Fill in the number of lines to ignore on Excel. As a general rule, it is the first line that corresponds to the titles given in each column. The computer will not take this line into account.
Note: These same elements will be included in your Excel file. The order of fields must therefore be respected between this parametrisation process and your Excel file.
Note: The first field is ‘Recipient‘, and in your Excel file the first column will also be “Recipient”. The recipient corresponds to the user identifier (User ID).

- Save the form after parametrising your options, so that they can be taken into account.
Note: It is now possible to ‘push’ data in a Table. Do not hesitate to consult our tutorial about the Advanced Push.
2. Create the Excel file to import .
Your Excel file must contain the columns corresponding to the import model defined in 1.
In our example:
- Recipient, that is, the user identifier (ID).
- Place
- Intervention address – Address
- Intervention address – Zip
- Intervention address – City
- Intervention address – Country
- Call time
- Date of intervention

- Then save this file, on your desktop for example.
Note for the Check-box element: Enter “true” in your Excel document if you want your box to be ticked as ‘yes’.
3. Import the Excel file to push the forms.
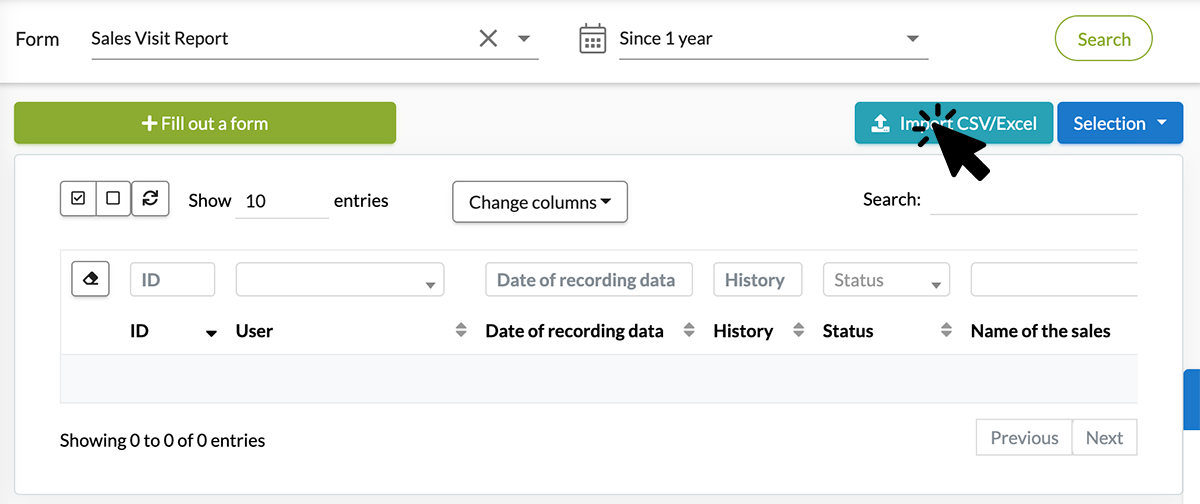
- On the History page, select the form on which you want to work.
- In the top right corner of that page, click on the Import CSV/Excel button.
- Choose your previously prepared Excel file by clicking on Browse or drag it into the window.
- When loading is finished, click on the top right cross to quit. The file will be sent automatically.

You are now ready to do Push data by transferring from your computer to field workers. Users will receive a notification advising them ‘you have new forms received‘.
Status of your ‘pushed’ forms (pre-filled forms).
Want to see if your field staff has received or completed the form? You can find this information in History!
- Go to Data -> History -> Select form.
- Add the column ‘Status‘ and if you wish, the column ‘Recipient‘.

Here, you can follow the change in status of all data!
 : Traditional (not ‘pushed’) entry completed.
 : Push present on user’s mobile but user has not yet acknowledged notification.
 : Push awaiting recovery by user, user has acknowledged notification but has not yet clicked on the form located in received.
 : The user has completed entry of the push.

You can sort according to status. You just need to click on Status and then click on: Finished, Retrieved or Pushed (awaiting recovery by recipient).

The read-only feature
The Read-only change or Push check box in the Advanced options in your items makes the field unmodifiable. This feature is very interesting when transmitting information that should not be changed by field users.
![]()
Note: There is another method for making an automated push: using our Web Service. This method requires a level of computing skills. If you require more information, please contact our team on +33 490 23 67 60 or at support@kizeo.com.
Do not hesitate to comment on this article!
All your questions, comments and suggestions are most welcome!
 Cookies give you a personalized experience
Post a comment